Overview
The Atomos Shinobi 5" Monitor is an on-camera monitor with DCI 4K, UHD 4K, and HD video input.
With several monitor features, it can help you get a great shot with great exposure and focus. It only has (1) HDMI input, making a great option for the C70.
It's smaller size is great for small productions and run & gun documentary shoots.
The monitor supports popular log formats from Sony, Canon, Panasonic, ARRI, RED, and JVC cameras.
Table of Contents
- EDC Atomos Shinobi 5" Monitor Component Guide
- Quick Start Guide
- Troubleshooting
- Compatible EDC Accessories
- Tips & Tricks
EDC Atomos Shinobi 5" Monitor Component Guide
Quick Start Guide
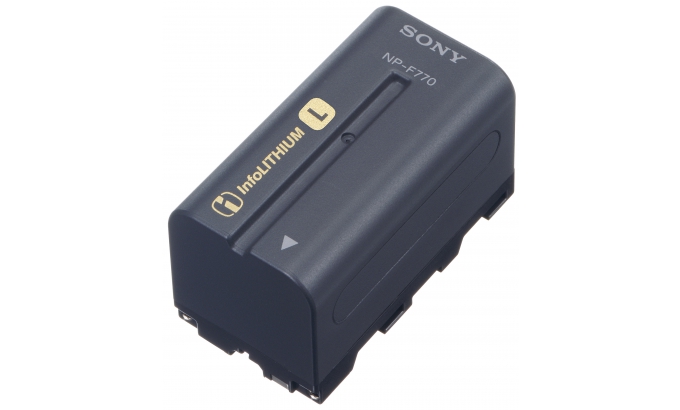
You will need a Sony NP-770 battery OR a battery with D-Tap Port
*Vended Separately*
First Steps
Mounting to a Camera using the Cine Arm
You will need a camera with Cage that has a 3/8"-16 ARRI Accessory Threads or NATO rail, such as a Canon C70 or the ARRI Alexa 35.
Connecting the Cine Arm to the Monitor Cage
- You can use either side of the Cine Arm to connect to the monitor cage.
- NATO Clam Ball Head
- Slightly loosen the small blue tie-down on the clam clamp.
- Slide on the bottom lip of the monitor cage and center on the cage.
- Tighten the small blue tie-down to secure
- 3/8"-16 ARRI Ball Head
- Line up the ball head with pins to the bottom of the cage with the large 3/8"-16 hole with the two small holes next to it.
- Use the ball head's thick collar with the holes to tighten into the cage.
- Line up the ball head with pins to the bottom of the cage with the large 3/8"-16 hole with the two small holes next to it.
Connecting the Cine Arm to the Camera Cage
- You can use either side of the Cine Arm to connect to the camera cage.
- NATO Clam Ball Head
- Slightly loosen the small blue tie-down on the clam clamp.
- Slide on nato rail on the camera cage.
- Tighten the small blue tie-down to secure
- 3/8"-16 ARRI Ball Head
- Line up the ball head with pins to camera cage with the large 3/8"-16 hole with the two small holes (ARRI Port) next to it.
- Use the ball head's thick collar with the holes to tighten into the cage.
Example Cage - Canon C70
Use the Cine Arm's large blue center tie-down to
adjust the angle of the mounted Monitor
Powering On
-
Using Sony NP-770 Battery
- Line up the holes on the bottom of the battery with the Battery slot (Located on the back of the monitor)
- Slide the battery holes down straight into the pins on the battery slot until it clicks.
-
Do not force the battery in.
-
Using the Battery Eliminator and D-Tap to DC Cable.
- Screw the DC side of the D-Tap to DC Cable in to the Battery Eliminator

- Insert the battery elimnator into the battery slot on the back of the monitor.
- Line up the holes on the bottom of the battery eliminator with the battery slot.
- Slide the battery holes down straight into the pins on the battery slot until it clicks.
- Do not force in.
- Insert the D-Tap side of the D-Tap to DC Cable into the D-Tap port on the battery.
- Screw the DC side of the D-Tap to DC Cable in to the Battery Eliminator
- Turn the monitor by pressing the ⏻ button located back of the monitor
Connecting to a Camera
You will need a camera a HDMI Port
- Plug the HDMI cable into the IN HDMI port on the left side of the monitor
- Plug the HDMI cable into the camera's HDMI port.
Operations & Assist Tools
Home Screen - Information Bar
- Input Menu
- Touch the source input menu to the top left of the
screen to bring up the input menu. - Here you can check your input status, match your camera output to the monitor and audio settings.
- For Camera Output, simply tap the OFF toggle to ON and cycle through Standard for Camera Brand, and match your recording settings to the monitor using the selections ot the right.
- For Audio tap ,you can adjust output volume from the monitor
- Under INFO, you can factory reset the monitor's settings if the monitor is acting up or if you want all settings wiped for an blank slate.
- Touch the source input menu to the top left of the
Main Screen - Monitoring Features
- To access the monitoring feature, tap the MON button on the bottom left side of the screen.
- To turn on/off a monitor feature, tap on its icon.
- To adjust the monitor feature, tap the SETTINGS button on the bottom right side of the screen.
Monitoring Features
Troubleshooting
Q: Can I use the power supply to power the monitor?
A: No, the power supply is for the battery charger ONLY. Using it with the monitor will cause damage.
Q: I am not getting any signal from the camera.
A: The HDMI might not be securely connected - unplug the HDMI cable on both sides and reconnect.
OR
If your camera has multiple outputs, check your camera output settings to ensure you have HDMI selected.
OR
The HDMI is broken. Contact the EDC for additional support.
Q: I put a LUT on and it doesn't look right.
A: Check your camera's output settings and ensure it is sending out a clean image without a LUT.
Compatible EDC Accessories
Access is dependent on class equipment allocations & availability
- Canon C70
- Canon R5 c
- ARRI Alexa 35
Tips & Tricks
- Always test your HDMI cable at the very least when checking out from the EDC.
- Always ensure your monitor is securely mounted to the camera.
- You can mount the Monitor to a light stand with a 3/8-16" thread.
- Do not use in the rain.